Singer Serger Manual: A Comprehensive Guide
Navigating your Singer serger requires understanding its features‚ troubleshooting common issues‚ and performing routine maintenance. This guide offers solutions for thread bunching and skipped stitches.
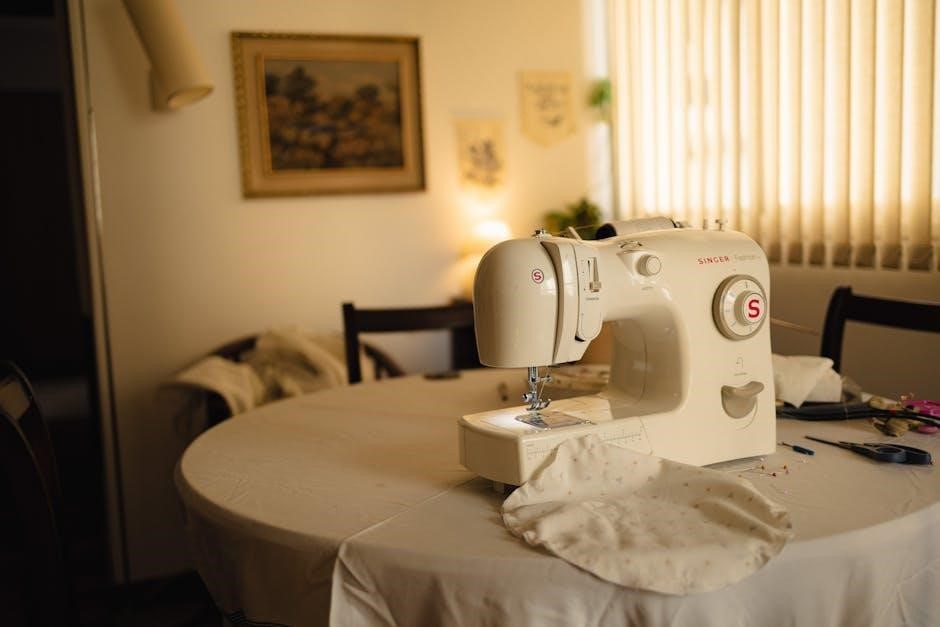
Singer sergers represent a cornerstone in modern sewing‚ offering capabilities beyond traditional sewing machines. These versatile machines excel at creating professional-quality seams‚ finishing raw edges‚ and constructing garments with speed and precision. Unlike a standard sewing machine that uses lockstitch‚ a serger utilizes loopers and needles to simultaneously stitch and overlock‚ preventing fabric fraying.
Understanding the fundamental differences between sergers and sewing machines is crucial. Sergers are designed for efficiency and durability‚ particularly suited for knit fabrics and projects requiring a clean‚ finished edge. They are invaluable for garment construction‚ quilting‚ and crafting.
This manual aims to demystify the Singer serger‚ providing a comprehensive resource for both beginners and experienced sewists. We will explore the machine’s components‚ threading techniques‚ and troubleshooting tips‚ empowering you to unlock its full potential. Learning to maintain your serger will ensure years of reliable performance.
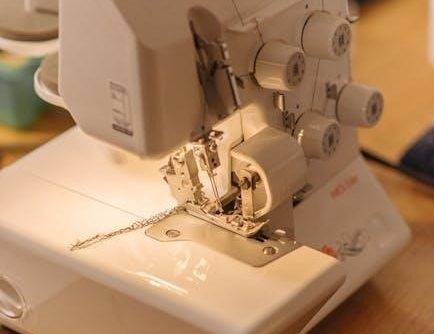
Understanding Serger Components
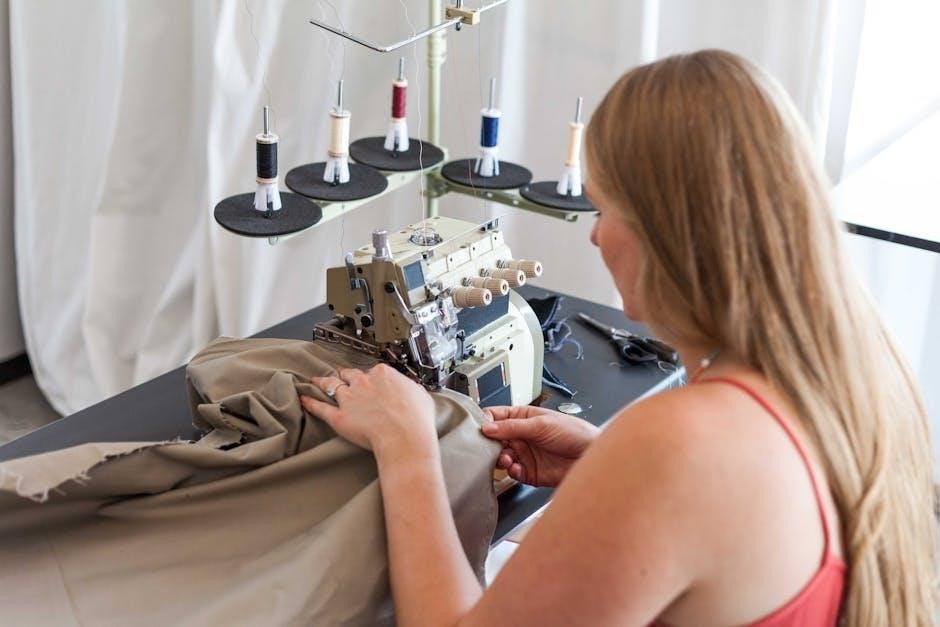
A Singer serger comprises several key components working in harmony. The needles create the initial stitch formation‚ while the loopers interlock the threads‚ creating the overlock stitch. Typically‚ a serger features an upper and lower looper‚ each playing a distinct role in the stitching process.
The feed dogs control fabric movement‚ and the differential feed mechanism allows for adjusting the feed rate to prevent stretching or puckering‚ especially crucial for knit fabrics. The stitch length and stitch width controls dictate the appearance and strength of the seam.
Furthermore‚ the tension dials are vital for balancing thread tension‚ ensuring a consistent and even stitch. Understanding how each component interacts is fundamental to successful serging. Proper maintenance‚ including regular cleaning and needle replacement‚ is essential for optimal performance and longevity of these intricate parts.
Threading a Singer Serger: General Principles
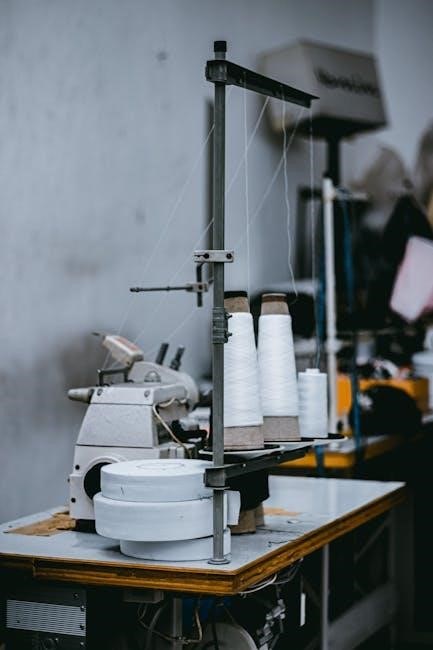
Successful serging hinges on correct threading. Always begin with the machine unthreaded‚ raising the presser foot to release tension. Follow the threading path precisely as illustrated in your serger’s manual – each model varies! Generally‚ start with the upper looper‚ then the lower looper‚ and finally the needles.
A helpful technique‚ when re-threading‚ is to tie the new thread to the old‚ gently pulling it through the threading path. This avoids having to re-thread the entire machine. Ensure the thread is securely seated in each tension disc and guide. Incorrect threading is the primary cause of many serger problems‚ like thread bunching.
Consistent thread quality is also crucial. Regularly check your threading and tension‚ as vibrations during sewing can cause slight adjustments. Refer to your specific model’s diagram for the correct sequence.
Specific Threading Guides for Popular Models (14CG754‚ 6600‚ etc.)
Singer serger threading differs significantly between models. For the 14CG754‚ begin with the upper looper‚ following the numbered path on the machine. Next‚ thread the lower looper‚ ensuring it’s correctly positioned in the tension assembly. Finally‚ thread the needles from left to right.
The Singer 6600 utilizes a color-coded threading system; match the thread color to the corresponding guides. This model often benefits from the “tie-on” method – attaching new thread to the old to pull it through. Always consult the detailed diagram in your manual.
Other popular models‚ like the 9630‚ have unique threading paths. Online resources and YouTube tutorials specific to your model number are invaluable. Remember to always raise the presser foot before threading!
Needle and Looper Threading Techniques
Proper needle threading is crucial for serger performance. Use a needle threader for ease‚ especially with fine threads. Ensure the thread is fully inserted into the needle eye from front to back. Incorrect threading causes skipped stitches and tension issues.
Looper threading demands precision. The upper looper requires careful navigation through multiple guides; a bent or broken guide will hinder smooth threading. The lower looper is often more challenging; the “tie-on” method – securing new thread to the old – simplifies this process‚ pulling the thread through the looper’s eye.
Always double-check that the thread is seated correctly in each guide and tension disc. Consistent tension is vital for a professional finish. Refer to your model’s manual for specific diagrams and instructions.
Differential Feed Adjustment Explained
Differential feed is a key serger feature controlling fabric feed rate between the needles and the feed dogs. Adjusting this setting prevents wavy seams or stretched fabrics. A higher differential feed (above 1.0) gathers fabric‚ ideal for ruffles or decorative effects.
A lower setting (below 1.0) reduces fabric feed‚ preventing stretching on knit or lightweight fabrics. This ensures a smooth‚ even seam. A setting of 1.0 represents a balanced feed‚ suitable for most woven fabrics.
Experimentation is key! Test different settings on scrap fabric before serging your project. Incorrect differential feed causes puckering or stretching. Consult your serger manual for specific recommendations based on fabric type and desired effect.
Stitch Length and Width Control
Stitch length determines the distance between each stitch‚ impacting seam strength and appearance. Longer stitches are suitable for heavier fabrics or when a looser seam is desired‚ while shorter stitches provide greater security for delicate materials.
Stitch width‚ on many serger models‚ controls the width of the overlock stitch. A wider stitch creates a more substantial seam allowance and increased fabric coverage. Narrower stitches are ideal for finishing lightweight fabrics or creating a neater edge.

Adjusting both length and width allows for customization. Always test settings on scrap fabric to achieve the desired result. Incorrect settings can lead to puckering‚ stretching‚ or a weak seam. Refer to your Singer serger manual for specific guidance.
Adjusting Stitch Density
Stitch density‚ closely related to stitch length‚ refers to the number of stitches per inch. Increasing density means more stitches packed closely together‚ resulting in a stronger‚ more durable seam – ideal for high-stress areas or frequently washed garments.
Decreasing density creates a looser stitch formation‚ suitable for decorative edges or fabrics that require more give. Adjusting density is crucial for preventing puckering on delicate fabrics and ensuring a flat‚ professional finish.
Your Singer serger manual will detail specific settings for various fabric types. Experimenting with density on scrap material is vital. Remember‚ higher density doesn’t always equate to better quality; it depends on the project’s needs.
Troubleshooting Common Serger Problems
Serger issues can be frustrating‚ but many are easily resolved. Common problems include thread bunching‚ often caused by improper threading or tension imbalances. Skipped stitches frequently stem from dull or incorrect needles‚ or incorrect threading. Looper thread breakage usually indicates excessive tension or a poorly threaded looper.

Before seeking professional help‚ consult your Singer serger manual for specific troubleshooting steps. Re-threading the machine is often the first and most effective solution. Ensure the presser foot is up when threading to release tension discs.
Regular cleaning and maintenance‚ as outlined in the manual‚ prevent many issues. Remember to use the correct needle and thread types for your fabric. A systematic approach to diagnosis saves time and frustration.
Thread Bunching Issues
Thread bunching is a frequent serger frustration‚ typically occurring on the underside of the fabric. This often signals incorrect threading – meticulously re-thread the machine‚ ensuring each thread path is correctly guided through tension discs and guides. Improper tension is another key culprit; start by balancing the tensions‚ slightly loosening the upper looper tension.
Verify the presser foot is raised during threading‚ as this releases tension on the threads. Using incorrect thread weight or type for your fabric can also cause bunching. Ensure the needle is correctly inserted and not bent or damaged.
Finally‚ lint and debris buildup within the tension assembly can impede smooth thread flow; regular cleaning is vital. If problems persist‚ consult your Singer serger manual for model-specific guidance.
Skipped Stitches: Causes and Solutions
Skipped stitches on a Singer serger indicate a break in the stitch formation‚ often appearing as gaps in the seam. A dull or damaged needle is a primary cause; replace it with a new‚ appropriate needle for your fabric type. Incorrect needle insertion – ensuring it’s fully seated – is also crucial.
Thread issues frequently contribute; use quality thread and verify it’s correctly threaded through all guides and tension discs. Improper tension‚ particularly the looper tension‚ can lead to skipped stitches. Adjust tensions incrementally‚ testing after each change.
Fabric feed problems‚ like incorrect differential feed settings‚ can also cause skipping. Finally‚ lint buildup around the needle and looper area can interfere with stitch formation; regular cleaning is essential.
Looper Thread Breakage
Frequent looper thread breakage on a Singer serger signals a few potential problems. Often‚ the issue stems from incorrect threading – meticulously re-thread the looper‚ ensuring the thread passes through all guides without obstruction; Tension is another key factor; excessively tight looper tension dramatically increases breakage risk. Loosen it slightly and test.
Using the wrong type or size of thread for your fabric and serger model is a common mistake. Always consult your manual for recommended thread types. A bent or damaged looper can also cause breakage; inspect it carefully and replace if necessary.
Finally‚ accumulated lint and debris around the looper area can weaken the thread. Regular cleaning‚ as detailed in the maintenance section‚ is vital to prevent this issue.
Serger Maintenance and Cleaning
Regular maintenance is crucial for optimal Singer serger performance and longevity. Lint and thread debris accumulate quickly‚ impacting stitch quality and potentially causing malfunctions. After each use‚ brush out the looper area and feed dogs with the provided brush. A can of compressed air can also effectively remove lint from hard-to-reach spots.
Periodically‚ oil the serger’s moving parts‚ following the lubrication diagram in your manual. Avoid over-oiling‚ as this attracts more lint. Inspect the blades for sharpness; dull blades cause skipped stitches and frayed edges. Replace them when necessary.
Deep cleaning should be done every few months. Remove the needle plate and thoroughly clean underneath. A small vacuum cleaner attachment is helpful. Consistent cleaning prevents issues like thread breakage and ensures smooth operation.
Replacing Serger Needles
Replacing serger needles is a straightforward process‚ vital for maintaining stitch quality and preventing damage. Always power off and unplug your Singer serger before beginning. Consult your model’s manual for the correct needle type and size – using the wrong needle can cause issues.
Loosen the needle clamp screw and gently remove the old needle. Insert the new needle‚ ensuring the flat side faces the correct direction (refer to your manual). Tighten the screw securely‚ but avoid over-tightening. Repeat for any other needles needing replacement.
Inspect the blades simultaneously; dull blades and incorrect needles often contribute to similar problems. Replace needles frequently‚ especially after serging thick or abrasive fabrics. A fresh needle ensures clean‚ consistent stitches and extends the life of your machine.
Understanding Serger Feet and Their Uses
Singer serger feet significantly expand your machine’s capabilities‚ allowing for diverse seam finishes and decorative effects. The standard foot is ideal for basic overlocking‚ creating professional-looking edges on fabric. A blind hem foot creates nearly invisible hems‚ perfect for delicate garments.
Gathering feet create ruffled effects‚ while a piping foot assists in inserting decorative piping into seams. Rolled hem feet‚ often included with sergers‚ produce narrow‚ elegant rolled hems. Specialized feet exist for techniques like flatlock stitching and decorative embellishments.
Refer to your serger manual to identify the correct foot for each application. Proper foot selection ensures optimal stitch formation and fabric handling. Regularly cleaning your serger feet prevents lint buildup and maintains smooth operation.
Rolled Hem Technique with a Singer Serger
Achieving a delicate rolled hem on your Singer serger requires specific settings and the appropriate foot. Begin by attaching the rolled hem foot‚ designed to guide the fabric for a narrow‚ finished edge. Reduce the stitch length to its shortest setting‚ typically around 1.0-1.5mm‚ for a tightly rolled edge.
Adjust the differential feed to a lower setting (e.g.‚ 0.5-1.0) to prevent puckering. Gently guide the fabric edge into the rolled hem foot‚ ensuring it curls under as it feeds through. Test on a scrap piece of fabric to fine-tune the settings before working on your project.
Consistent fabric feeding is crucial for a uniform rolled hem. Practice makes perfect; experiment with different fabrics and settings to master this versatile technique.
Flatlock Stitching Guide
Flatlock stitching creates a remarkably strong and decorative seam‚ ideal for activewear and garments requiring flexibility. To achieve this with your Singer serger‚ you’ll need to adjust the stitch finger and potentially the looper tension. Begin by disengaging the upper knife‚ ensuring a clean‚ uncut edge.

Adjust the stitch finger to the ‘flatlock’ position – consult your serger manual for the specific setting. Slightly loosen the looper thread tension to allow the threads to lay flat. Test on scrap fabric‚ gradually adjusting tension until the stitches interlock neatly without puckering.
Flatlock seams are created by pressing the seam open after serging. This reveals the interlocking stitches‚ forming a flat‚ durable‚ and visually appealing finish.
Overlock Stitch Variations
Singer sergers offer a diverse range of overlock stitch variations beyond the standard four-thread finish. Exploring these expands your garment construction possibilities. Rolled hems‚ as previously discussed‚ create a delicate edge‚ perfect for lightweight fabrics like chiffon.
Differential feed adjustments influence fabric gathering or stretching. Increasing the differential feed gathers fabric‚ useful for creating ruffles‚ while decreasing it stretches the fabric‚ ideal for swimwear or knitwear. Experiment with these settings on scrap fabric.
Chain stitches‚ achieved by deactivating certain threads‚ provide a quick and strong seam‚ often used in industrial applications. Flatlock stitches‚ detailed elsewhere‚ offer both strength and a unique aesthetic. Mastering these variations unlocks your serger’s full potential.
Serger Safety Precautions
Operating a Singer serger demands strict adherence to safety guidelines. Always disconnect the power cord before threading‚ changing needles‚ or performing any maintenance. Keep fingers clear of the moving blades and loopers during operation – these are extremely sharp and can cause serious injury.
Never attempt to serge over pins or thick materials that could strain the motor or damage the machine. Use the appropriate needle and thread for the fabric type to prevent breakage and potential hazards. Ensure adequate lighting to clearly see the threading paths and stitch formation.
Regularly inspect the power cord for damage and avoid using the serger in damp environments. Keep the machine clean and free of lint buildup‚ as this can pose a fire risk. Prioritize safety for a seamless and enjoyable serging experience.
Resources for Singer Serger Manuals and Support
Finding assistance for your Singer serger is readily available through various channels. The official Singer website (www.singer.com) provides a comprehensive library of downloadable manuals for numerous models‚ including the 1100 and 1120 series. You can search by model number to locate the correct documentation.
PatternReview.com (www.patternreview.com) hosts a vibrant sewing community forum where users share troubleshooting tips and advice. This is an excellent resource for resolving specific issues or seeking guidance from experienced serger operators. Additionally‚ YouTube features numerous tutorial videos demonstrating threading techniques and maintenance procedures.
Singer’s customer support team can be contacted directly via phone or email for personalized assistance. Remember to have your serger’s model number handy when seeking support.
Finding Replacement Parts for Your Serger
Locating replacement parts for your Singer serger is crucial for maintaining its functionality. The official Singer website (www.singer.com) offers a dedicated parts store where you can search for components using your serger’s model number. This ensures compatibility and accurate ordering.
Several online retailers specialize in sewing machine parts‚ providing a wider selection and potentially competitive pricing. Websites like SewParts.com and Amazon often carry Singer serger components. When ordering‚ carefully verify the part number and compatibility with your specific model.
Local sewing machine repair shops can also source replacement parts and offer expert advice. They may have common parts in stock or can order them on your behalf. Maintaining a relationship with a local repair technician can be invaluable for long-term serger care.
Advanced Serger Techniques: Decorative Stitching
Beyond basic overlocking‚ Singer sergers unlock a world of decorative possibilities. Experiment with different thread types – metallic‚ variegated‚ or textured – to create unique finishes. Adjusting stitch length and width dramatically alters the appearance of your serged edges.
Chain stitches‚ created by looping the chain looper thread‚ offer a distinct decorative element. Rolled hems‚ while functional‚ can also be aesthetically pleasing with careful thread selection. Explore combining different stitch settings to produce layered effects and intricate patterns.
Consider using contrasting thread colors for bold accents or monochromatic schemes for subtle elegance. Practice on scrap fabric to master tension adjustments and achieve desired results. Online resources and dedicated serger workshops can further expand your decorative stitching repertoire.